Thursday, August 29, 2013

Real Italian Pesto

What better than a simple Italian traditional Pesto?


"Ligurian Pesto is the second most popular sauce for pasta after the tomato based one and, certainly, the most popular one when it comes to cold sauces.  The name Pesto derives from the Italian verb to crush, "pestare", because for a real Ligurian Pesto, the ingredients have to be crushed using a wooden pestle and marble mortar.  The classic ingredients for Pesto alla Genovese are basil grown in Liguria (Ocimum Basilicum) hence the name, coarse sea salt, pine nuts, garlic, Ligurian extra virgin olive oil and grated Pecorino Romano cheese of the best quality."
SOURCE: http://www.italymagazine.com/italy-featured/liguria/recipe-pesto-alla-genovese


Traditionally, Pesto was made using a Mortar and Pestle (some still make it this way) ~ thank goodness for the invention of Cuisinarts or better known as food processors or even blenders (yes, you can make it in a blender as well because Pine Nuts are very soft nuts).


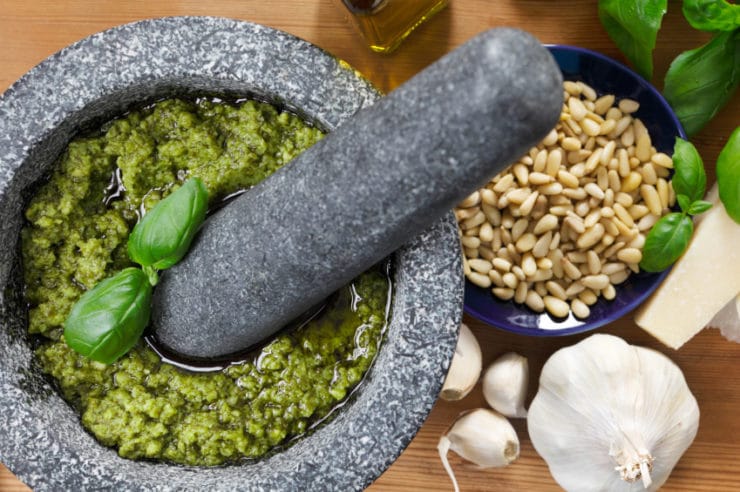
Photo courtesy of http://theshiksa.com/images/2011/05/Pesto-Mortar.jpg


I have made fresh "Real" Italian Pesto many times over the last 15 years ...that's when I first started growing my own fresh Genovese (or Sweet) Basil ... never following a recipe as Pesto is one of those things that isn't an exact science ... well at least fresh pesto isn't ... a recipe calling for 2-3 small cloves of garlic, for instance, heck cloves really vary in size from bulb to bulb, so its basically about taste.  I've used the pre-minced Garlic that you can buy versus the freshly minced and in my opinion, freshly minced Garlic is BEST!


However, I've never frozen it so I checked out a few websites and found, on lacuocaciccia.com the secret to keeping it bright green after freezing ~ blanching the Basil prior to preparing!!!  Here's my version ... its delicious!


Let's get started ...


Real Italian Pesto


2 lrg bunches of Organic Genovese (or Sweet) Basil (about 2 cups tightly packed) Leaves ONLY


2 heaping Tblsps Pine Nuts, lightly toasted*


2-3 Garlic Cloves, minced just before adding


4-6 Tblsps  Extra Virgin Olive Oil


Pinch (or two) Sea Salt


About 3 Tblsps Pecorino Romano/Parmigiano Cheese


* To toast Pine Nuts, place a drizzle of EVOO in a skillet and heat on medium heat.  Toss in Pine Nuts and toss around ... they toast up quickly so do not take your eyes off them.  You want them to be just lightly browned (tanned).


The amounts of Sea Salt, Pine Nuts, Garlic and Cheese are approximate ... Best way to get it just like you like it is to start out adding half of recommended amounts and taste test ... add more ... taste test add more ... you may find you use more or less then recommended.  Sometimes too, I have found, that the Basil can be the taste factor in adding the other ingredients ... as some years it just tastes better than others ... which is true for growing anything (herbs, fruits or veggies).


Boil a pot of salted water.  Prepare a large ice bath while water is heating (ice and cold water).  Once water is boiling, add the Basil for 8-10 seconds ONLY.  Remove and immediately plunge into the ice bath, swirling leaves around for a couple seconds.  This stops cooking process.  I use tongs for this.  Remove and drain of excess water.  I use a Salad Spinner (love my spinner).  If you do not have a Salad Spinner you can use either a Fine Mesh Strainer or lay on paper towels.  


In a Cuisinart (or blender), lightly process some of the Pine Nuts, Garlic and a tablespoon (or two) of the EVOO.  Add all the damp, blanched Basil and blend again on high-speed, slowly adding more Pine Nuts, Garlic, EVOO and Sea Salt, to taste.  


Makes 2 (4 oz) jars.  Leave about 1/4 inch between jar seal and Pesto as once it is frozen it will expand (like most things) and you DO NOT want broken jars.  Also, make sure you top off the Pesto with a thin layer of EVOO before sealing and freezing ~ keeps Pesto from browning on top.


Yum ~ doesn't that look delicious?

Monday, August 19, 2013

Oven Roasted Okra


Ain't nothing quite as Southern as Okra but growing up as a Southern girl eating plenty of good ol' Southern cookin' and even spending many summers on my Granddaddy's farm ... I refused to try Okra ... no matter how it was cooked: Fried, Stewed with Tomatoes, Tossed into a Gumbo or Brunswick Stew and most definitely NEVER boiled ... eeeew that slimy looking mess ... no way it was going near my mouth.  AND then after once trying to help pick fresh Okra outta the field and having to wear gloves to do it cause the plants have these sticky things that sting and cut your fingers ... I swore I would never eat this stuff ... "if you have to wear gloves to pick it, it's not supposed to be eaten" I said.  LOL

But flash forward to my 30's ... yep it wasn't until I was in my 30's that I let Okra near my mouth.  How that came about was at the time I was working for THE BEST BOSS EVER and he would bring me a plate at lunch (he had a cook that prepared lunch for him) and when it would have Fried Okra on it, I'd turn my nose up at it, wouldn't touch it.  A Co-Worker said "Girl I'll eat it if you won't" and then proceeded to convince me to at least give it a try "it tastes sorta like popcorn, only better".  Well me loving popcorn ... that was the magic word ... I tried it and my love affair with Fried Okra began.  Thanks Kel!!  From then on I loved Okra anyway I had it except boiled LOL  AND to this day, anytime I'm in a restaurant that serves Fried Okra, I have got to try theirs ... course not everybody knows how to cook it, I've learned.  


Okay now about this recipe ...ya'll it is the BEST way I have ever had Okra believeyoume ...definitely a way better tasting (and healthwise) way to eat it instead of fried.  Ya'll have got to give this recipe a try!  AND best yet ... its easy easy easy!!!


Oven Roasted Okra
(2-3 Servings)


1 lb Fresh Okra (you could probably use frozen too)
Extra Virgin Olive Oil*
Sea Salt
Fresh Cracked Black Pepper


Preheat oven to 450 degrees.


Wash the Okra and dry good with a paper towel.  Now, I sliced some of mine and left some of the baby sized ones intact so it doesn't really matter if you slice it or leave it whole.


Place Okra in a bowl and toss with enough EVOO to cover it good (just til it glistens) ... don't over do it cause you don't want it to turn out mushy ... and Sea Salt and Black Pepper, to taste.  I actually did taste mine raw to make sure I had enough Sea Salt on it ... and dang if it wasn't good raw too!


*The recipe I sorta followed called for a Tablespoon, I do not think I used that much but I really wasn't measuring ... just do not over do it ... you do not want it sitting in oil!!!


Spread Okra onto a baking sheet (even a baking stone would work ...probably make it turn out crispier) in a single layer and cook for 15 minutes BUT every 5 mins take it out shake the Okra around and put it back in.  Now your oven make take a bit longer ... you know how ovens can vary!


Ya'll this is so good I could eat it for a snack!  And a healthy snack it would make too!!!!

I'll say it again ... better than fried ...  ya'll will thank me for sharing this recipe, I promise you that!!!

Friday, August 16, 2013

Rosemary's Sage Natural Hair Colorant

Some of my beautiful Sage in my Kitchen Herb Garden
I found this natural 'remedy' on Facebook when a friend posted the link ... so being its all natural and made with herbs, things I am into and which I just happen to grow in my Kitchen Herb Garden ... it sounded like something worth giving a try.


Yea, I'm a little skeptical BUT definitely hopeful that it works ... at least to some degree.  Along with my lupus comes crazy bouts with psoriasis, which, right now, among other places, is in my scalp (one side).  Though I've had it before ... this time I'm having trouble getting it to clear up completely, even with the chemical drugs the doctor has given me for both internal and external use ... its being stubborn and will not completely clear up ... which leads to a problem ... I CANNOT have my hair colored ... at least, not until it is cleared.  Sure don't want my hair falling out (heck I've had that too but that's another story).  So TODAY ~ August 14, 2013 ... I started using this 'Tea' to see if it really works! Oh and I like to call it Rosemary's Sage Tea ... cause I like the sound of it!

This was my first batch of harvesting Sage ... I thought for sure this
would easily make 1/4th cup of Rubbed Sage ... NOT!
Here it is AFTER its been dried ... not much huh?
Here's my second batch of harvesting Sage ... this along
with the first batch made EXACTLY 1/4th cup Rubbed Sage!!!
This is how I hung it to dry in my Laundry Room.
Basically, this is what the article I read stated:


"This recipe is for a natural hair rinse to gradually conceal graying hair. This homeopathic natural hair rinse will brighten and color grey hair naturally."


What you will need:


1/4 cup Rubbed Sage
1/4 cup Rosemary Leaves
(Organic, if possible)
1 cup Distilled Water

My ingredients for the 'Tea'
Lucky for me I grow my own herbs so harvesting was relatively easy ... at least the Rosemary was ... I just cut off a branch from one of my many Rosemary plants and stripped off the leaves.  Now the Sage, which I normally use by harvesting the leaves and using them directly in recipes, took a little more effort.  I've never gone to the trouble to make Rubbed Sage, though the flavor is much stronger then just using the leaves fresh from the garden.  You can find instructions on making Rubbed Sage here:  http://www.ehow.com/how_8634966_make-rubbed-sage.html#page=0  To buy this much Rubbed Sage in the grocery store would be costly as I'm pretty sure a bottle or tin of it doesn't contain 1/4th cup and it took me quite a bit of leaves to get 1/4 cup Rubbed Sage!!!  So here's another link if you'd like to buy some in bulk: http://www.mountainroseherbs.com/

Here's where I was getting ready to 'rub' the Sage.
Here's what Rubbed Sage looks like.
TO MAKE:


Put Distilled Water into a medium saucepan over medium heat.  Bring to a gentle rolling boil.  Add the Herbs, cover the pan, and remove from heat.  Let mixture steep for at least 30 minutes.


Place a coffee filter into a colander, and place the colander on top of a bowl. Pour the Rosemary's Sage 'Tea' slowly into the coffee filter.  Some herbs may fall into the filter but don't worry if they do.  Set the pan aside.   Take a large spoon and gently press on top of any solids to extract all of the liquid.  Don't want to miss a drop after all the work getting to this point!

Getting all the liquid out!
Discard filter and any solids.  Pour Rosemary's Sage 'Tea' into a clean, sterilized glass jar or bottle and allow liquid to cool.
Final product ~ Rosemary's Sage Tea
Discard after 7 days and make fresh.  Store in a cool place ... I chose to refrigerate mine.  Tea can be warmed by placing bottle in warm water.


TO USE:


There is 2 ways you can use this on your hair ... I chose the second one since my hair is not gray all over ...only at the roots.


* After shampooing and rinsing as normal: Position head over a large bowl; pour a small amount of the Rosemary's Sage Tea over hair.  Massage in thoroughly.  Repeat, letting any excess run into the bowl.  Do this 5-10 times.  Dry hair as normal.  Pour any remaining Tea back into your glass bottle, and store in the refrigerator for next use.


** In between shampoos, put a small amount of Tea on a cotton ball and dab onto any visible gray areas.  I dabbed it by parting every few inches, dabbed along part and repeated all across my head ~ just like the colorist does when she touches up the roots.  


Supposedly ... most people see a noticeable difference in hair color after only one month. The Tea helps soften and minimize the gray color. Gradually gray color fades and hair returns to its natural color.  Also ... "This is not an overnight solution or a quick fix like commercial hair dyes.  It is a tried and tested formula that works."


We shall see!  I'm not posting any BEFORE pics yet ... if this works even just a tiny bit ... I will update this post with BEFORE and AFTER pics, I promise.  Stay tuned!


Here's the link of the original article:

http://m.voices.yahoo.com/how-professional-look-home-hair-color-227774.html?cat=69

UPDATE ~ October 3, 2013

Ya'll I gave this a legitimate try using it for just over a month. It DID NOT work for me and I had high hopes that I would have SOME change or at very least toning down of the gray. So I am not uploading any before and after pics as I had NO difference whatsoever!